blog entry
Guidepost: A Self Hosting Introduction
Permalink for Guidepost: A Self Hosting IntroductionWhile I was compiling a list of resources for getting into the indie web the other day, I noticed that every single guide I was finding on "self hosting" anything was pointing people towards a VPS. I realize that the context here is largely within the self hosting of websites, not other things, but I honestly feel like guiding someone through VPS setup when they've never hosted their own anything before is kind of a bad move? Like yes, you should probably host a website on a computer that either doesn't run anything else, or exists in a datacenter somewhere, but before going into that world, I feel like it's important to learn as much as you can about it so that you can make your mistakes before your webserver is in a datacenter, possibly hundreds of miles away rather than somewhere where it can be physically accessed. This guide is geared towards someone who can put together the minimum hardware required to self host in a way that fits within data protection standards. This is NOT the only way to do things. This is just the setup I have landed on after maintaining my own home server and self-hosting machine for about fifteen years.
A Word of Caution Permalink to this heading
Hosting a public facing web service or website on your home internet connection and your home computer is not always a great idea. Especially if you start hosting a lot of services on the same computer and are mixing public and private services. From a security standpoint, you want to have important personal data and public facing data on different systems so that one is not accessible from the other or accidentally moved between them. For nearly everything we talk about here today, my recommendation, especially for beginners, is to focus on the services more aimed at content consumption rather than public facing stuff. I will also say that while I provide instructions here to make a private facing service available over the wider internet, my recommendation is to keep your services locked down and to only access them from outside your home network via a VPN like Tailscale.
Another note: The configuration I currently use does rely on Cloudflare services for out-of-home access so that a VPN isn't required. This is something I am not happy with and would like to avoid in the future, but I have had problems with the reliability of doing more of this work on my end of the hosting environment, so until I can move off of Cloudflare, I'm stuck. Again, for most people, a VPN like Tailscale is going to be the best move forward. I, unfortunately, cannot take advantage of that kind of option for reasons I won't get into here.
Hardware: Laying the Groundwork Permalink to this heading
A home server can really by anything you want or need it to be. Use an old laptop, a recovered enterprise workstation that's a decade old, a raspberry pi or build it yourself. The setup that I'm going to describe here does have ideal hardware requirements, so I'm going to specify those, but really you can make almost anything work with alternative operating systems. There's a couple reasons why I went the way I did and I'll enumerate those in the next section. For now, this is what I'm working with.
-
CPU: Ryzen 5 1600
-
RAM: 16GB of DDR4 (2x8GB)
-
GPU: The cheapest shittiest discrete GPU I could find that was still compatible (required for the computer to boot at all)
-
Storage:
- 3x SeaGate BarraCuda hard drives, 4TB each
- 1x PNY SATA 3 SSD, 256GB
- 1x Kioxia NVME SSD, 256gb (Optional)
-
Case: a $20 Rosewill number. Terrible to build in, not attractive, but cheap and came with fans.
-
PSU: Silverstone Focus series PSU, 550W
You'll note that this build is all consumer desktop parts. Nothing is special. A server is just a computer. If you want to follow my path as close as possible, you don't need to get the exact same parts as me. In fact, there's some significant upgrades you could make for not much money. The CPU in particular is pretty aged by this point. The important thing here is to get three storage drives that are all the same model and capacity as each other and a separate drive for the operating system. For the fourth drive, an SSD will make the system start up faster. It's important for the three bulk storage drives to all be identical. The filesystem we're going to be using, ZFS, works best on drives of the same size and model. It's just more reliable and if you're going to be self hosting anything, reliability is going to be the biggest difference between enjoying your services and abandoning them. The case and GPU I got specifically because they were dirt cheap. I didn't care about quality or ease of use here. They exist solely to make the computer run and not be a bunch of loose components in a pile on the floor. In terms of RAM, I do feel that limitation sometimes, but for most people, 16GB is enough. More is always better, but with the RAM shortage, steer clear of huge kits. The CPU in mine is a hand-me-down from my main desktop PC. The power supply is the only thing I actually splurged on. Having a dead silent PSU is super nice. It's less important now that the server isn't in the same room as me, but I'm still glad I got it. A higher tier PSU that is more power than you need is often able to be more efficient with that power, so it's a good long-term investment.
TrueNAS Community Edition: The Second Layer Permalink to this heading
I have run my home server on Windows Server, Ubuntu Server, and Unraid in the past, but for a long time now, I've been running TrueNAS Community Edition very happily. While Unraid might allow for hard drives of varied size, I found TrueNAS to be significantly more reliable. A word of caution: We are bringing a sledgehammer to a nail with this one. Most people don't need something this powerful. However, I like that it gives you a lot of room to grow and the flexibility of a custom config, even though the system does a lot to hold your hand through setting up many services. Another popular option for a home server is ProxMox. ProxMox is more flexible, but is also very complicated to set up, so I'd still recommend TrueNAS Community Edition.
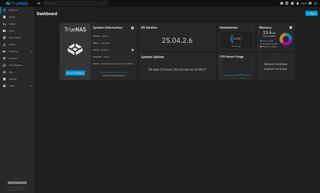
TrueNAS installs like a regular OS, then hosts a webserver available on ports 80 and 443 of the host machine. You should be able to connect by simply typing in your machine's hostname or iP into a web browser anywhere on your home network, so you can run it headless (with no mouse, keyboard, or monitor) after the first boot. I won't go into the full setup here. The documentation and guides widely available on the internet are good resources. I unfortunately don't have the ability to start over from scratch to properly describe the process, but I will hit a few things that aren't automatically set up by default that are really useful to have.
Data Protection and Redundancy Permalink to this heading
The whole reason we used three hard drives in the hardware section comes up here. TrueNAS uses a file system called ZFS. ZFS has built in software RAID capabilities. RAID stands for Redundant Array of Independent Disks. The entire description of RAID is out of the scope of this post, but what we are setting up is called RAID Z1. This is a way of combining your three hard drives into one big storage pool. The filesystem sees three separate drives that it balances and duplicates the data on such that any one hard drive can fail and you won't lose any data. Get a new drive and replace your dead one, let the filesystem rebuild the pool (called resilvering) and you are back to having redundancy again. If a second drive fails, though, you're up the creek. Still, when you compare to getting a single big drive, it's a nice security blanket. On the operating system and application side of the equation, you'll get a single big pool of storage.
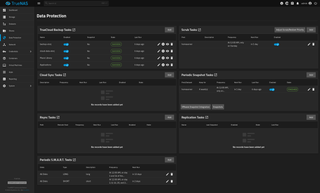
To make your data even more resilient, you'll want to set up backups in the Data Protection tab. RAID is not a backup system. it's a redundancy system. ZFS can snapshot datasets as long as they don't have any child datasets inside them. This will make more sense later, but for now, just know that for datasets that you can create snapshots of, it's worth doing because it will make your backup tasks faster and use less storage and bandwidth. For a backup provider, I went with Storj. It's cheaper than basically any cloud storage provider, Backblaze, or AWS. Performance has been fine as a backup-only system, and it integrates well with the TrueNAS UI. There are self hosted options for this as well, but they're a bit complicated and require setting up multiple machines, so I'm not going to go into those. Basically any S3 style storage provider is a good endpoint for your backups. This storage is slow, but cheap which fits the backup use case perfectly.
While you're here, set up a Scrub Task for once a week on your pool(s) and Periodic S.M.A.R.T. Tests on all of the disks. I do a long test twice a month and a short test once a week. The scrub task is a maintenance task for the ZFS filesystem. It keeps things running smoothly. The Self-Monitoring, Analysis, and Reporting Technology tests use information the hard drives in your system gather and report themselves in order to find bad sectors or other problems before the drives fail. They aren't foolproof, but should give you an early warning that a drive is about to die with enough time for you to get a replacement ready.
Finally, you'll want to stop by the System > General Settings section to set up email. You can do this with a free gmail account or many other email providers. Set it up and the server can send mail as the account you set. Then, go to Settings > Alert Settings and set up a new Alert service. If you pick e-mail, then put your email in the box, the server will send you an email from yourself anytime an alert on the server requires attention. You can set SMART test failures to be alerts so that you can stay on top of your drives and make sure you get replacements in the case of imminent failures. You can set various actions to be different alert levels, then choose the appropriate level for the notifications you want. I use mostly defaults and have the server send me a notification on any Warning level alert or greater.
Files, Datasets, and Shares Permalink to this heading
Okay, so now you've got a server running... itself and that's about it. What can we do with it? Well, quite a lot, actually, but we have to wade in slowly and build on early concepts to make our lives easier later. We'll start with
Datasets Permalink to this heading
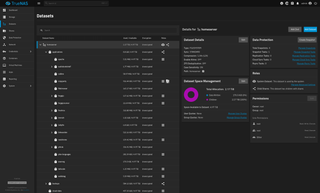
You can think of a dataset as a folder. It's more complicated than that, but generally, the basic thing a dataset does is organize your files. Datasets can have any number of child datasets inside them, and are displayed as a tree in the Dataset view. They walk like folders, they talk like folders. It's okay to think of them generally as folders. Go ahead and make a top level dataset in the Datasets menu. Keep in mind, though, that this is a Linux system, so files and folders are case sensitive! Datasets are no exception. Home and home are different things. So, for my example, I'm only ever going to use lower case for my names and if something is multiple words, I'll separate them with a hyphen. So for my top level dataset, I'll call it homeserver. When you make a dataset, you can specify what kind of usage you expect it to see. These options only change the Access Control List or ACL for the dataset. Basically, what users can and cannot access the files and folders within the dataset. For your top level, set it to Generic. This means only the root user can access anything inside by default. Inside my main dataset, I have a few others. The main tree looks like this
homeserver/
  applications/
  backups/
  cloud-data/
  homes/
  ix-applications/
  media/
applications is where our apps live. Not all apps have a built in version, so I'm going to recommend manually making datasets for each app's storage needs as we go, just to keep everything consistent between the automatic apps and the manual ones.
backups is where I host a SMB share for my desktop PC to back up to. You don't need this if you don't want it. I personally prefer this setup. Another option is to make user home directories inside the home dataset and put their backups in their home folder. Since I only support two users, myself included, this is not necessary.
cloud-data is called such because it started life as a dumping ground and backup for our Google Drive storage. Eventually it took over that same function, so cloud data it stays.
homes is where users' home directories will live. You don't need home directories, but sometimes it's useful for SSH (as an example) or other services.
The ix-applications dataset is going to be required by TrueNAS. It may have even already made it when you first set up the storage pool. I don't remember. It's where the system will store docker images for applications you install later.
media is where I store all my media. It's separate to make backing it up separately easier and also because several applications use it. If I were starting over, I might combine it with cloud-storage and call it bulk-storage or something.
Shares Permalink to this heading
A space for files is all well and good, but without a way to manage files on the server, you're going to have a bad time. TrueNAS supports a few methods of access by default.
Samba Permalink to this heading
Server Message Block, or SMB is the standard that Windows devices use to share files and printers over a network. On Linux and MacOS, the program that interfaces with these kinds of shares is called Samba, so Samba has become synonymous with SMB. TrueNAS supports SMB shares natively. Let's head over to the Shares screen and add a new one.
The Add SMB Share pane will give you some basic options. I would recommend setting your ACL up via the Dataset section and include permissions for SMB users there before making the share. If you need to make a new user, you can do so under Credentials > Users. Just make sure you have the SMB User checkbox checked. This will ensure a SMB password is set for the user account.
NFS Permalink to this heading
Network File System shares are the default sharing paradigm for Unix operating systems (Linux and Mac OS, mostly) and work a little differently. Since both ends are expected to use regular users on the system, permissions and sharing are handled the same way permissions would be on the host system. I personally haven't had as muhc luck with these, but you might have more experience with them.
Others Permalink to this heading
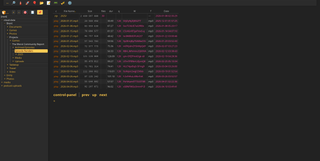
I do have a preferred way to handle shared files in my server and that's through Copyparty. Copyparty hosts a WebDAV server and a web UI for that server. I use Copyparty for a lot more than file shares, but file shares are one thing it's pretty good at! You can install Copyparty in the Apps page of your TrueNAS server.
Applications Permalink to this heading
TrueNAS has three ways of running applications. One is to use their built in Apps catalog and install them there. Another is to use the Virtual Machines section to run another OS inside your NAS server. The third is their new Containers section. I haven't used that section at all since it showed up, but it's the biggest contender for a thing that will make this guide obsolete. It might be a competitor to Podman or other Docker GUIs. I just haven't touched it at all. For the sake of this guide, we're going to stick to Apps
From here, you can browse the catalog and install anything you like. Some things to keep in mind, though.
- When possible, always make the datasets for your application data yourself by switching all data options away from ix volume to path on the host system and create a new dataset under
homeserver/applications. - Pay attention to the ACLs on your new datasets. If the user that the app runs as can't read or write to the dataset you make, you won't be able to run it. Thankfully most apps allow you to check a box to ensure the ACL is correct. Most apps run as an
appsuser, ID568by default. - You can also add extra storage to a given app. For example, I might have Jellyfin store its application data in a new dataset in
homeserver/applications/jellyfin/databut I'll click the "Add additional storage" button at the bottom of the install screen to add media storage to the app, setting the host path/homeserver/media/videoto mount as/hs-mediainside the container. Now, inside Jellyfin, I can add/hs-media/tvand/hs-media/moviesas media libraries without forcing all of my media to exist in/homeserver/applications/jellyfin/data/media/tvetc. This makes using the same files in multiple apps WAY easier. - You can manually install any docker app that uses docker compose. From Applications, click Discover Apps, then the 3-dot menu at the top right then Install via YAML. This will open a little text window where you can dump a Docker Compose file to create an app. Note that the default locations and ports are probably not going to work with your TrueNAS installation of the same app, so definitely read the documentation on the app specifically, as well as familiarize yourself with docker compose's documentation.
Each app is going to have slightly different options and needs, so pay attention as you make them. The differences are big enough that I can't really go over all of them here, but I will be going over an example of my complete setup for this site down below. Once you finish setting up the application, you'll see it show up in your Apps list. If it's something offered by default by TrueNAS, then there will be a WebUI button in the app details pane with the app selected. You can click that to finish any in-app setup needed or access your applications from inside your home network.
Since each app has its own specific config, I think I'll leave this part of the guide as it is. If you want help setting up any specific application that is in my list here, please shoot me an email via the contact form. Before I leave you, though, let's go through a complete example: This website!
Hosting a Blog on TrueNAS Scale Permalink to this heading
Prerequisites Permalink to this heading
This setup assumes that you have or are willing to get a few things...
- A Cloudflare account (necessary for the tunnel)
- A website you want to publish (my example will be a blog made with Hugo
- Some knowledge of how Git works (I'll do some light explaining of the commands we use)
- A working TrueNAS server
- A Domain Name that you own (so that you can manually set up the DNS.)
Name Server? I Hardly Knew Her Permalink to this heading
The very first thing you're going to want to do is set up your domain in Cloudflare. They make it pretty simple. You'll just need to enter the Cloudflare name servers in your domain registrar's setup. Once you have Cloudflare set up as your DNS provider, we can dig the tunnel.
Diggy Diggy Hole Permalink to this heading
Cloudflare Tunnels are a means to bypass your own firewall and NAT by hosting a client application in your home infrastructure and telling Cloudflare where traffic should go based on the domain or subdomain entered. As can be assumed, this is quite powerful and useful, but keep in mind that HTTPS, the default encryption on the internet, is administered by Cloudflare in this case. Basically, they are the ones holding your encryption keys here, so they can log all of the traffic that goes through the tunnel. Like I said up top, I don't like using them, but they are a necessary evil in my setup, and thus in my example.
First, set up a new tunnel in the Cloudflare UI. It'll be in Protect & Connect > Networking > Tunnels. As a part of the process, it will ask you to start the other end of the tunnel. To do so, click the Docker Operating System option and copy the command. Paste it into a text editor. It should look something like this:
docker run cloudflare/cloudflared:latest tunnel --no-autoupdate run --token eyJhIjoiOWY2YTIzZTFlZWYyMGJjZTk5ODNhZmUwMTJlNTM0OWQiLCJ0IjoiZWVhMjI5OTEtNGU3Zi00ZDg2LWI4NDYtNjc3N2I5ZTJkMjQ1IiwicyI6Ik1qVTJaVFopT0RZdE9UZ3hNQzAIImpkbExXSTNaRGN0WWpabU5UUTNaREJtTnpsaiJ9We don't need anything except the actual token, so delete everything up to and including the --token text, then re-copy the token and go back to your TrueNAS server's Apps page. Click Discover Apps then search for cloudflared and click Install. Paste your token into the Tunnel Token box, then scroll down and click Install. The default settings for everything else are fine. Once the app shows a green Running status, flip back over to your Cloudflare Tunnel setup tab and finish the basic setup. We'll come back to this, so for now just leave it be.
Build a Nest Permalink to this heading
Let's build the environment so that the webserver will work. Go to your TrueNAS server's Credentials > Users page and make a new user. You can call it whatever you want. Then, generate a new RSA encryption keypair. We'll need this for deploying the site. RSA encryption keys are pretty standard, so creating a keypair is well documented on all platforms. Open the settings for your new user and paste the Public key into the "Authorized Keys" section. Make sure it starts with ssh-rsa. You'll also want to set the user's shell to something reasonable. I use zsh.
Now that we have a user, go over to the Datasets page and make a new Dataset in the applications/ one. We'll call this one apache. Open the ACL Editor and add your new user to the access list with "Full Control" access. Also make sure you add the Apps user with full control.
Finally, let's install httpd, which is an apache webserver in a docker container. Go to Apps > Discover New Apps again, but this time, click the 3 dot menu then Install via YAML. Set a name for your new app, then in the custom config, we're going to tell it to install httpd.
services:
  apache:
    container_name: tk-web
    environment:
## Sets the user ID and group ID. Feel free to set these to the UID/GID of your new user account
      - PUID=568
      - GUID=568
## Set this to your timezone
      - TZ=America/Denver
## This tells Docker what image to use. It'll automatically pull from docker hub
    image: httpd:latest
## The first port is the port that you'll give Cloudflare for the service. Port 80 is what http traffic uses.
    ports:
      - '10000:80'
## This sets up the persistent storage. Apache serves the website via the htdocs folder, so we're making a link between that and the dataset we just set up.
    volumes:
      - /mnt/homeserver/applications/apache/public/:/usr/local/apache2/htdocs
Once everything is set to your liking, save it and TrueNAS will start building the app.
Deploy the Site! Permalink to this heading
Go to Cloudflare's tunnels UI and make a new Published Application Route. Set it to be your domain/subdomain of choice and tell Cloudflare to send traffic to http://<TrueNAS server IP>:10000. Now, you have a couple options for actually getting your site uploaded to the server.
Sharing is Caring Permalink to this heading
You can make the applications/apache dataset a share via SMB or NFS. Just make a new folder in there called public and dump your site there. If you're using Hugo, the public directory is made and updated whenever you run the hugo command. It'll be in the root of your Hugo project directory.
SSHe Sells Sea SSHells Permalink to this heading
You have an authorized SSH user already. You can transfer files to the server using scp or sftp. Just remember that those protocols don't delete old files. They only copy new files and overwrite old ones of the same name. You can build a little script to run Hugo, then deploy the site immediately after, like this:
#!/bin/bash
CWD=$(pwd)
cd /home/USER/Projects/hugoblog
hugo
scp -r public Remote-User@Server-IP:/mnt/homeserver/applications/apache
cd $CWD
This script can be run from anywhere in the system. It saves your current working directory to a variable, goes to the project directory, runs hugo, then copies the files to the server. If you add the SSH key to your user account, TrueNAS won't ask for your user's password.
Sync the Battleship Permalink to this heading
You can also use Rsync to copy stuff over. The command will look mostly the same as above, but you'll want to use some options. -vzr --delete specifically. These will copy all files, even in subdirectories while maintaining the structure and compress the files in transit. It will also delete files that aren't in the source directory. Your script will look something like this now.
#!/bin/bash
CWD=$(pwd)
cd /home/USER/Projects/hugoblog
hugo
rsync -zr --delete public Remote-User@Server-IP:/mnt/homeserver/applications/apache
cd $CWD
Go on, Git Permalink to this heading
This is a more advanced option, but does allow you to push updates to your blog from anywhere. It'll require a code forge that supports Actions, like Forgejo, Gitea, GitLab, or GitHub. I use a self-hosted Forgejo server. I'll skip describing that setup, since it's a little bit more involved. I highly recommend it, though! It was a fun and rewarding experience. Here's the general setup for the repository:
- Make a new, empty repository then, in a new empty folder on your computer,
git pullit so that you can initialize it on your system. - Copy your Hugo project directory into the git repo, so that the root of the git repo is your hugo project's root directory.
- Use
git commit -Ato add all files to a new commit, thengit commit -m "initial commit"to set the commit message and finallygit pushto push your changes to the repo. This gives you a baseline in case something goes wrong. - In the root of your git repo, add the correct folders for an Action, as well as an empty action file. In my case, it's
.forgejo/workflows/action.yaml. - In the repository settings, enable Actions and make sure a Runner is available. We'll be using Docker for this one.
- Add Variables for
USER(your SSH user on TrueNAS),IP(The IP of your server) and a Secret,SSHKEY(that holds the private key of the RSA key pair you made earlier)
Then, open the yaml file you made earlier in a text editor and put in our Action
name: deploy
## This allows the action to run whenever a new commit is pushed to the main branch
on:
  push:
    branches:
      - main
## And when you manually or automatically call the workflow to run
  workflow_dispatch:

jobs:
  deploy:
    runs-on: docker
    container:
## This is the official Hugo image for deploying sites made using it.
      image: ghcr.io/gohugoio/hugo:latest
    steps:
## This step makes a working copy of the repository that the runner can work on.
      - name: Pull repo
        uses: actions/checkout@v4
        with:
## This is required for hugo themes to work properly
          submodules: true
          fetch-depth: 0
## This runs the Hugo command with --minify to make the code smaller and lighter
      - name: build site
        run: hugo --minify
## This calls an additional action that will copy our site to the server
      - name: Deploy site with Rsync
        uses: https://github.com/Burnett01/rsync-deployments@v8
        with:
## These options tell Rsync to be Verbose, Compress during transit, copy recursively, and delete files that don't exist in the source.
          switches: -vzr --delete
          path: "public/"
          remote_path: "/mnt/homeserver/applications/apache/public/"
          remote_host: ${{ vars.IP }}
          remote_user: ${{ vars.USER }}
          remote_key: ${{ secrets.SSHKEY }}
Now, make a new commit with your action.yaml and make sure the action ran successfully! You can now push an update to your blog anytime anywhere just by writing a new markdown file and adding it to the repo. Since you already have your httpd container and Cloudflare tunnel up, you should be able to go to your domain and see the site live as long as the action completes successfully.